Cara Mengkalibrasi Positioner Katup Kontrol (Panduan Lengkap)
Jika Anda berurusan dengan sistem kontrol proses, mengetahui cara mengkalibrasi positioner katup kontrol sangat penting untuk menjaga kelancaran dan efisiensi operasi. Panduan ini memandu Anda melalui seluruh proses, mulai dari dasar-dasar hingga pemecahan masalah, memastikan katup Anda berfungsi dengan andal. Baik Anda menangani model pneumatik, elektro-pneumatik, atau pintar, kalibrasi yang tepat mencegah waktu henti yang mahal dan mengoptimalkan kinerja.
Apa Itu Positioner Katup Kontrol dan Mengapa Kalibrasi Penting
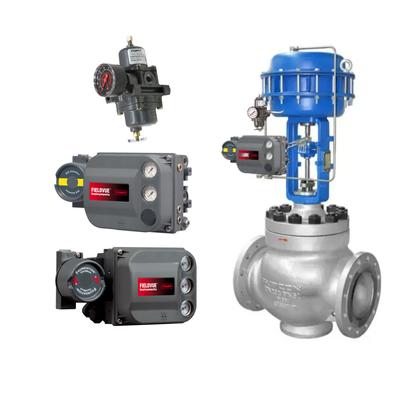
Positioner katup kontrol bertindak sebagai otak di balik aktuator katup Anda, menerjemahkan sinyal input menjadi gerakan batang yang tepat untuk mengatur aliran. Jenis pneumatik mengandalkan sinyal tekanan udara, yang elektro-pneumatik mengubah sinyal listrik seperti 4-20 mA menjadi output pneumatik, dan positioner pintar menambahkan diagnostik digital untuk kontrol yang ditingkatkan.
Akurasi Katup Kontrol: Kekuatan Positioner
Kalibrasi memastikan positioner secara akurat mencocokkan sinyal kontrol dengan langkah katup, mempertahankan akurasi umpan balik posisi dan fungsi positioner katup kontrol secara keseluruhan. Tanpa itu, Anda berisiko mengalami histeresis, deadband, atau respons yang tidak konsisten yang mengganggu proses. Misalnya, di pabrik kimia atau kilang minyak, presisi ini meningkatkan stabilitas dan keselamatan.
Hal ini penting untuk merek seperti Fisher DVC6200, yang menawarkan komunikasi HART untuk diagnostik; Masoneilan SVI II, yang dikenal karena penyetelan pneumatiknya yang kuat; Foxboro SRD991, dengan konversi elektro-pneumatik yang andal; atau Flowserve Logix 3200MD, yang menampilkan analisis tanda tangan katup tingkat lanjut. Kalibrasi rutin menjamin akurasi langkah, meminimalkan penyimpangan, dan meningkatkan keandalan kontrol proses.
Kapan Positioner Katup Kontrol Harus Dikalibrasi
Kalibrasi setelah pemasangan baru atau penggantian aktuator untuk membuat dasar. Jika sistem Anda menunjukkan masalah seperti katup yang tidak merespons sinyal, tindakan yang tertunda, offset output, langkah yang tidak lengkap, atau osilasi (hunting), saatnya untuk pemecahan masalah dan kalibrasi ulang positioner katup.
Untuk perawatan preventif, bidik setiap 12-24 bulan, tergantung pada kondisi pengoperasian—lingkungan yang keras mungkin memerlukan pemeriksaan yang lebih sering. Frekuensi kalibrasi katup ini membantu mendeteksi keausan sejak dini, menghindari kegagalan yang tidak terduga dalam aplikasi kritis.
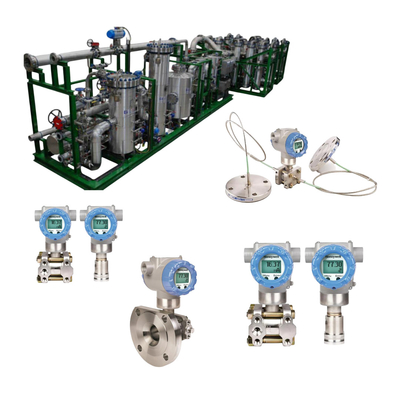
Alat dan Kondisi yang Diperlukan Sebelum Kalibrasi
Kumpulkan alat kalibrasi ini untuk pengaturan positioner katup:
- Generator sinyal 4-20 mA untuk mensimulasikan input kontrol.
- Suplai udara yang diatur yang bersih dan kering untuk mencegah kontaminasi.
- Pengukur tekanan untuk memantau tekanan suplai dan output.
- Indikator langkah atau kaliper digital untuk mengukur perjalanan katup secara akurat.
Kalibrasi positioner katup kontrol
Untuk langkah-langkah keselamatan, isolasi katup dari media proses, kunci/tandai sumber energi, dan konfirmasi aktuator berada pada tekanan nol. Bekerja di area yang berventilasi baik, kenakan APD untuk menghindari bahaya dari udara bertekanan atau cairan sisa.
Prosedur Kalibrasi Langkah-Demi-Langkah
Ikuti prosedur kalibrasi katup kontrol ini untuk mencapai penyesuaian nol dan rentang. Gunakan pendekatan sistematis untuk konsistensi.
1. Verifikasi Pemasangan dan Penyelarasan Mekanis Nol
Periksa sambungan, lengan umpan balik, dan penanda langkah untuk pengaturan yang tepat. Pastikan tidak ada pra-beban pada nol mekanis—sejajarkan batang katup pada posisi tertutupnya tanpa tegangan. Sambungan yang longgar di sini dapat memiringkan seluruh kalibrasi.
2. Terapkan Sinyal Input dan Atur Nol (0%)
Hubungkan generator sinyal dan terapkan 4 mA (atau sinyal pneumatik yang setara). Sesuaikan sekrup nol atau gunakan trim perangkat lunak hingga batang katup mencapai posisi 0% persis. Konfirmasi dengan indikator langkah—tidak ada gerakan yang boleh terjadi di luar titik ini.
3. Atur Rentang (100% Langkah)
Naikkan hingga 20 mA atau sinyal maksimum. Katup harus mencapai langkah penuh. Sesuaikan pengaturan rentang atau penguatan agar sesuai, memastikan aktuator memberikan gaya yang diperlukan tanpa overtravel.
4. Verifikasi Titik Tengah (50%)
Input 12 mA dan periksa apakah katup berada pada langkah 50%. Catat setiap kesalahan dalam linearitas atau pengulangan, lalu sesuaikan nol dan rentang secara iteratif. Langkah ini menangkap histeresis sejak dini.
5. Lakukan Kalibrasi Otomatis (untuk Positioner Cerdas)
Untuk kalibrasi otomatis katup pintar, libatkan fitur seperti Kalibrasi Perjalanan Otomatis DVC6200 atau penyetelan pneumatik SVI II. Pantau diagnostik dan kurva tanda tangan untuk masalah seperti gesekan atau keausan pengepakan. Ini mengotomatiskan sebagian besar proses, meningkatkan akurasi.
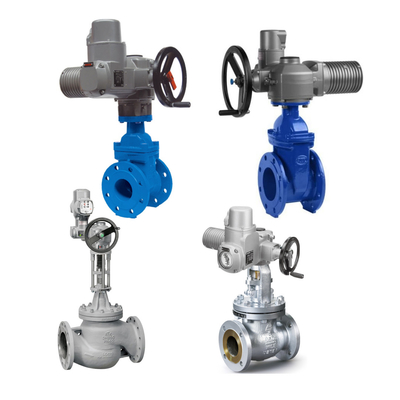
Prosedur Kalibrasi katup Kontrol
Langkah-langkah kalibrasi katup kontrol ini memastikan pengoperasian yang andal di berbagai model.
Masalah Kalibrasi Umum dan Cara Memperbaikinya
Dalam panduan pemecahan masalah positioner katup ini, atasi hunting (jitter langkah) dengan memverifikasi penguatan PID dan memperbaiki kebocoran udara. Jika katup tidak mencapai langkah penuh, periksa ukuran aktuator atau pengaturan rentang. Histeresis atau deadband yang besar sering kali berasal dari gesekan sambungan umpan balik—lumasi atau sejajarkan kembali. Tidak ada respons? Periksa kabel sinyal dan suplai tekanan untuk kesalahan.
Atasi kesalahan kalibrasi ini segera untuk memulihkan fungsionalitas.
Keselamatan dan Praktik Terbaik
Jangan pernah mengkalibrasi di bawah tekanan—selalu dekompresi terlebih dahulu. Patuhi udara instrumen yang kering dan bersih untuk menghindari kerusakan akibat kelembapan. Catat semua data, termasuk pembacaan pra dan pasca-kalibrasi, untuk catatan perawatan. Jalankan diagnostik berkala seperti tanda tangan katup untuk memprediksi kegagalan.
FAQ Tentang Kalibrasi Positioner Katup Kontrol
Apakah saya perlu mengkalibrasi positioner pintar baru?
Ya, bahkan yang baru pun mendapat manfaat dari kalibrasi di tempat untuk memperhitungkan variabel pemasangan, meskipun fitur otomatis menyederhanakannya.
Apa perbedaan antara penyetelan dan kalibrasi?
Kalibrasi mengatur nol dan rentang untuk langkah yang akurat; penyetelan menyesuaikan parameter PID untuk kecepatan respons dan stabilitas.
Berapa lama kalibrasi berlangsung?
Biasanya 30-60 menit untuk manual, kurang untuk kalibrasi otomatis pintar, tidak termasuk waktu penyiapan.
Bisakah kalibrasi memperbaiki kebocoran katup?
Ini meningkatkan pemosisian tetapi tidak akan menyelesaikan keausan dudukan atau segel—yang memerlukan perbaikan mekanis.
Kesimpulan
Menguasai cara mengkalibrasi positioner katup kontrol dengan benar menjaga integritas sistem Anda, memperpanjang umur peralatan, dan menstabilkan proses. Dengan mengikuti langkah-langkah ini, Anda akan meminimalkan kesalahan dan meningkatkan efisiensi. Untuk saran langsung yang disesuaikan dengan pengaturan Anda, konsultasikan manual pabrikan atau teknisi bersertifikasi.

 Pesan Anda harus antara 20-3.000 karakter!